Friday, April 24, 2009

Snickerdoodles!

Last weekend I tried out another Lovin' From the Oven cookie recipe - her snickerdoodles! I followed the recipe pretty much exactly and the cookies were absolutely delicious, as per usual.

Here's the recipe:
1/2 cup butter, softened
1/2 cup shortening
1/4 cups white sugar

1 1/4 cup brown sugar

2 eggs

2 teaspoons vanilla extract

2 3/4 cups all-purpose flour

2 teaspoons cream of tartar
(available in the spice aisle with cinnamon)
1 teaspoon baking soda

1/4 teaspoon salt

2 tablespoons white sugar

2 teaspoons ground cinnamon


Preheat oven to 400 degrees.
Cream together butter, shortening, 1 1/2 cups sugar, the eggs and the vanilla. Blend in the flour, cream of tartar, soda and salt. Chill dough for at least an hour (I did it overnight). Shape dough into balls. Mix the 2 tablespoons sugar and the cinnamon. Roll balls of dough in mixture. Place 2 inches apart on ungreased baking sheets. Bake 8 to 10 minutes, or until set but not too hard.

Thursday, April 23, 2009

Caramel-filled Black and White Cupcakes


Easter was recently, and that means lots of adorable egg shaped candies. I saw a few pictures on foodgawker of Cadbury creme egg cupcakes, so I decided to make my own version. Unfortunately I only have a small-medium muffin tin so I couldn't really fit an entire Cadbury egg AND cupcake batter. AND it turns out those eggs are mad expensive. SO I ended up getting mini caramel filled eggs. I couldn't decide if I wanted vanilla or chocolate cupcakes, so I went with both :D I modified the recipes based on what ingredients I had available, and I completely replaced all purpose flour with white whole wheat flour, which made the batter really thick and almost cookie- or muffin-like, as opposed to cake-like. Anyway, the chocolate cupcake recipe is modified from here, and the vanilla cupcake recipe from here.

yield: ~40 small-medium sized cupcakes
INGREDIENTS

40 caramel egg candies

For the chocolate batter
  • 3/8 cup unsweetened cocoa powder
  • 3/4 cup white whole wheat flour
  • 1/2 teaspoon baking powder
  • 1/4 teaspoon salt
  • 3/4 cup (1 1/2 sticks) unsalted butter, room temperature
  • 1 cup sugar
  • 3 large eggs
  • 1 teaspoon pure vanilla extract
  • 1/2 cup sour cream
For the vanilla batter
  • 1 1/2 sticks unsalted butter
  • 1 1/2 cups sugar
  • 2 eggs
  • 2 teaspoons pure vanilla extract
  • 2 1/2 teaspoons baking powder
  • 1/4 teaspoon salt
  • 2 1/2 cups flour
  • 1 1/4 cups milk
For the frosting
  • 1/2 stick unsalted butter, at room temperature
  • 3/4lb. powdered sugar
  • 1/2 c. sour cream
  • 4 oz cream cheese, at room temperature
  • assorted food coloring, if desired

1. Preheat oven 350degrees. Butter and flour your muffin tin(s).
2. Make the chocolate cupcake batter. In a medium bowl, sift together cocoa, flour, baking powder, and salt; set aside. In a mixing bowl, cream butter and sugar until light and fluffy. Beat in eggs, one at a time, then beat in vanilla. Reduce speed to low. Add the flour mixture alternating with sour cream, starting and ending with the flour mixture.
3. Make the vanilla batter. Put butter in mixer and beat at medium speed until somewhat smooth. Pour in sugar and beat well. Add 2 eggs. Mix well. Add: vanilla, baking powder, salt, flour, and milk. Beat until smooth.
4. Place a heaping teaspoon of chocolate batter into the bottom of each cupcake. Gently place an unwrapped candy on top of the batter. Then scoop a heaping teaspoon of vanilla batter onto of each candy. Because the whole wheat flour-to-baking powder ratio is pretty high, it's ok to fill these muffin cups up all the way.
5. Bake the cupcakes for ~15 min until the tops are golden brown and a toothpick (inserted as close to the middle as possible without piercing the caramel) comes out clean. Allow to cool completely before frosting (but not necessarily before trying one :D).

6. For the frosting, beat together the butter and cream cheese until smooth. Add the sour cream and continue beating while sifting the powdered sugar into the mixture. Add a few drops of food coloring as desired. Frost the cupcakes and enjoy! Make sure you serve the cupcakes at room temperature otherwise the caramel will be too hard and it'll interfere with the consistency.

Wednesday, April 22, 2009

Heath Bar cookies

A couple weekends ago (I'm behind in my blogging!), I decided to try another recipe from my favorite baking blog, Lovin' From the Oven. Every recipe I've made from this blog has been FABULOUS (sometime I'll have to post about her Grandma's Triple Chocolate Chip Cookies which were a mega hit at a party I brought them to), so I was really excited to try her Heath Bar Cookies. I love, love, LOVE heath bar, and obviously I love cookies so I thought it would be a good combination. I followed the recipe as is on her blog, substituting 1 cup brown sugar and 1/2 c white sugar instead of 3/4 cup of each (I LOVE brown sugar...I actually like to eat it just by itself, but maybe I shouldn't admit that). Anyway, I even followed her instructions to chill the dough for at least 45 minutes (I actually chilled it overnight) in order to stop the cookies from spreading out too much. Welllllll........despite all that, when I took my cookies out of the oven they were thinner than quarters!
Somehow I must have ended up with too high of a butter:flour ratio, which isn't too surprising since I tend to guestimate with my flour. However, despite the fact that they looked less than perfect, these cookies tasted AMAZING. Seriously. I. COULD. NOT. STOP. EATING. THEM. I mean, I have that problem with most food, but this was out of control. I guess it's not surprising; since when has too much butter ever made anything taste BAD?

Anyway here's the "recipe" I followed -- I'd guess I probably actually used slightly less than 2 c flour, so I'd use that if you like your cookies thin and buttery..if you like them normal, then you could try actually using measuring cups!

1 cup (2 sticks) butter
1 cup brown sugar
1/2 cup white sugar
2 eggs
1 teaspoon vanilla
2 1/2 cup flour
1 teaspoon baking soda
1 teaspoon salt
1/2 bag toffee pieces
4 Heath Bars, chopped

Beat butter and sugars until fluffy. Add eggs, one at a time, and vanilla. In a small bowl, combine flour, baking soda, and salt. Gradually add flour mixture to butter mixture. Stir in toffee and Heath pieces. Chill for at least 45 minutes. Bake at 350 degrees for 10 minutes.

Sunday, April 19, 2009

Chhole-Bhatura and Aloo Shaak


Chhole is a dish of chickpeas in a tomato-based sauce, and it's traditionally eaten with bhatura, which is a fried bread made from white flour. A few weeks ago (I'm way behind on my posts too!) we made this dish with a simple potato dish. The chhole and potato recipes are direct rips from my mother's recipes. We never really made bhatura at home (my mom generally made poori instead, which is fried, unleavened bread made with whole wheat flour) to eat with these dishes. Additionally, we'd usually eat them with shrikand, which is a dish made by pressing the water out of yogurt and then adding sugar and saffron. But that process generally takes over a day so it didn't happen :)

The potatoes are made just like the aloo gobi from last month, omitting the cauliflower. I added a handful of defrosted frozen peas after the potatoes were done cooking to add some color.

The bhatura were made based off a recpie found here. The recipe turned out to make the dough waaaay too moist, so we ended up doubling the flour and the baking powder, and adding a few tablespoons of oil and water.

Chhole-Bhatura
yield: ~7 servings

For the Chhole:
4 small-medium onions, chopped
7 plum tomatoes, chopped
vegetable oil
1 tsp ginger paste
1 tsp garlic paste
3 green chilis, spliced once down the vertical center
1 tsp red chili powder
1 tsp turmeric
1 tsp cumin-corriendar powder
1/2 tsp garam masala
1 tsp ground black pepper
1 tsp salt
3 cans chick peas

For the Bhatura:
2 cups of white all-purpose flour
1 tsp baking powder
1/2 tsp salt
1 cup non-fat yogurt
Water
Vegetable oil (lots of it--for frying)

Coat a medium-sized frying pan in vegetable oil and place over medium-high heat. When the oil is heated, add the onions and stir until coated in oil. Cook the onions until translucent, about 5 minutes. Keep stirring occasionally and cover if necessary to keep from sticking. Add the garlic paste, ginger paste, and green chilis and cook for another minute. Then add the remaining spices and the tomatoes. Stir and cover. Reduce heat to medium and allow to simmer for about 5 minutes until tomatoes have reduced and the onions are cooked through. Remove from heat and allow to cool slightly. Remove the green chilis and discard. Place the onion-tomato mixture in a blender and puree. Return the mixture to the pan (or a saucepan) and add the drained chick peas. Cover and simmer on low heat for about 10 minutes to allow the chick peas to soften slightly and absorb some of the flavor.

To make the bhatura, sift together the flour, baking powder, and salt. Combine slowly with the yogurt and a few tablespoons of water and oil until a manageable dough forms. Set aside for 1-2 hrs in a warm place. Then break off small balls of dough (golf-ball-sized) and coat with more flour. Roll into circles about 2mm thick. Heat ~4 inches of oil in a thick-bottomed pot (eg the bottom of a pressure cooker or a wok). To test the oil, slide a tiny ball of dough (size of a whole black peppercorn) into the hot oil. If it sizzles and floats and cooks immediately, the oil is ready. Slide the bhaturas in 1-3 at a time (depending on the size of your pot). Cook on either side for a minute until golden brown. Remove from oil and drain on a paper towel.

Serve everything together warm, with yogurt. Make sure you eat the traditional Indian way--with your hands! :)

Sunday, April 12, 2009

Asparagus Risotto for risotto virgins

One of my favorite easy meals is Asparagus Risotto. Whenever I tell people I like to make risotto, they always seem really impressed, but it's actually really easy. It does however require a lot of time and PATIENCE -- approximately 30 minutes of standing over the stove, stirring constantly. This is the first risotto recipe I ever tried and I found it so tasty and easy that I've never really tried any others, I just switch the asparagus out for other ingredients when I feel like it. Asparagus is the best one, though (maybe because asparagus is my favorite vegetable, so I'm a little biased). Another benefit of this dish is that it's made in one pan and it makes 3-4 servings, so it can easily feed a family (or a single person for the better part of a week) with very little clean-up involved. The only complaint I've ever heard about this (from an unappreciative male, of course!) is that it's bland. Unfortunately, I was raised on fairly bland food (no offense to my mom - I wouldn't eat anything that wasn't bland when I was a kid) so I don't really know the first thing about spices and am not really sure how to liven it up. Risotto in general is supposed to be fairly mild, I think, and the creaminess that comes from the arborio rice gives it enough of a flavor for me! Also, I don't own a risotto pan, and I don't think it makes any difference if you make it a frying pan, contrary to what Carrie's snarky Russian boyfriend said on SATC.


Ingredients (3-4 servings):
1 tablespoon butter
1 tablespoon olive oil
1 cup arborio rice (special rice for making risotto that naturally gets creamy as it cooks)
1/4 cup white wine
1/2 minced garlic clove (I'm usually too lazy to do this, so I toss in some garlic powder)
1/2 cup parmesan cheese
1/4 cup pine nuts
1/2 bunch asparagus

Directions:
On medium heat, add olive oil and butter to pan and swirl until coated. Add pine nuts and saute for 3 minutes. Add garlic and rice and saute for 1 more minute. Add the wine and cook until absorbed, about 30 seconds. Add about 3 cups of hot water and stir continuously. Simmer the rice for about 10 minutes, stirring constantly. If the rice begins to stick to the bottom of the pan, add more water, 1/2 cup at a time until absorbed. You need to add more water if you can't see any liquid in the pan. Meanwhile, chop asparagus and add, continuing to stir and add more water as needed. Continue adding water and stirring until the mixture becomes creamy and the rice is tender. Add 1/4 cup parmesan cheese, blend, remove from heat. Serve with remaining parmesan on top!

PIZZA


Tried to make whole wheat deep dish pizza. The whole wheat part was fine, but the deep dish part didn't work out so well. I modified this recipe by approximately halving it and using white whole wheat flour for all the flour. I should have halved it one more time and added some more salt. I topped the pizza with chutney, yogurt (for extra moisture), tomatoes, mushrooms, green onions, and lots of mozarella cheese.

Tindora Subzi

My favorite vegetables are tinora, which are also called tindola or giloda. They're like little cucumbers, except you cook them. I've never seen them in a non-Indian store, so I have no idea what you'd call them in English. But anyway, they don't have too much taste, but they have a really fun texture. I cook them the same way as the aloo gobi, but I omitted the black peppercorns and the chili. Just a note--if they're pink inside, they've gone bad! It's always sad when that happens :(

The whole gilodas:

At home we always slice them up lengthwise. My mom and I have decided that if they're chopped any other way, they just don't taste as good!


For some reason, we also always eat this subzi with sliced potatoes. Somehow the thin giloda slices with the wide potato slices make for a very fun experience :)

Best thing to eat these with: chapattis, or rotlis. These take a while to make and I haven't quite gotten used to our stove so I can't get the baking temperature just right, so I don't usually make them. But I hadn't seen good giloda in the store for a long time, so I figured I'd go all out.

The little balls of dough ready to be rolled:


And ready to be baked:


The finished product! Slathered in butter, of course...

Banana Bhajias

These are a yummy sweet and salty snack. A lot like the fried bananas you find in Thai restaurants, but they're coated with a batter made from chick pea flour instead of wheat flour. I had a beginning-to-rot banana so I used it like this...but I would generally recommend just making some banana bread out of rotting bananas to avoid all the fat :)


1 banana, sliced into 1/4"-1/2" slices
1 c chick pea flour (aka graham flour)
1 c water
1/2 tsp cayenne pepper
1/2 tsp turmeric
1 tsp salt
chopped cilantro (optional)
lots of oil (I use vegetable, and I avoid olive because it has a low boiling point so it's more dangerous to work with)

Combine all ingredients and coat banana slices with the batter. Heat about 2" of oil in a thick pot (I use the bottom of a pressure cooker). Oil is ready when a drop of batter in the oil doesn't sink to the bottom and sizzles and cooks instead. Add a few banana slices at a time and flip as necessary. When both sides are golden brown, remove from oil and drain on a paper towel. Eat fresh! I eat them with the cilantro-coconut chutney, but maybe that's just because I eat that chutney with most everything!

Tuesday, April 7, 2009

Alton Brown's Apple Pie

Our friends DSY have a special talent when it comes to pies. They've been known for such masterpieces as lemon meringue pie and kiwi pie. This week, they followed Alton Brown's instructions for a delicious apple pie (recipe here).

See the before picture:

Aaaand the after:

Barely a morsel left :)

猫耳朵/Sweet Fried Wontons

Saturday, some friends had a dinner party, and I chose to bring something that could act as either a sweet appetizer or a dessert. 猫耳朵 (loosely translated as "cat ears" - take that, Andrew) are a kind of deep-fried wonton with red bean paste filling that is absolutely delicious. I think they're best piping hot from the fryer, but they're also pretty yummy after they've cooled.

Time: 0:30
Serves: 15-20

Ingredients
1 can thick red bean paste (if it's too watery, the texture won't be as good)
1 package thin wonton wrappers
a lot of oil
some water

1. Fold about a teaspoon of red bean paste into each wonton wrapper. I dabbed my finger in water and circled the wrapper right around the bean paste, before folding it in half and sealing the bean paste inside without completely sealing the wrapper together like for normal wontons. You can fold them into whatever shapes please you - I'll put some suggestions in the variations section.

2. Heat up the oil in a wok - make sure you've put enough oil in to cover the wontons. When it's hot, put in NO MORE than five wontons at a time (too many will cool down the oil too much). Flip them if you feel the need to, but make sure you take them out just as they start to brown (about a minute). Set them on a paper towel soak up the excess oil.

Variations
After sealing the wrapper, fold it in half the same way, then bring the two corners (on the fold) together, dab a little water on the corners, and seal them together. This is the cat ear.
After sealing the wrapper, just bring the two corners corners on the fold together and seal together, without folding in half. This looks more like a crown.
Seal along a diagonal and bring the corners on the fold together and seal together. This looks like a bishops hat.
Use homemade red bean paste (another post, another time :) or some other filling (chocolate, lotus seed paste, what have you). The variations really are endless. It's sweet, it's fried, it's pretty - people will like it by definition.
To avoid frying, try baking it on wax/parchment paper at 275F. I've found it difficult to get the wrapper to bake without the bean paste liquidating and oozing out, so it might be easier to press the wrappers into a muffin pan (so you form little cups) and spoon some bean paste into it.

Monday, April 6, 2009

Easy Samosas and Chutney

Basically the only appetizer I know how to make are samosas and an accompanying chutney. Traditionally, samosas are a crust of buttery, flaky pastry, filled with spicy potatoes and peas, and deep fried. But making the crust takes too long, and deep frying takes forever too. Not to mention it's horrible for your arteries. Anyway, here I present an easier method for samosas. Which may or may not be any healthier. But at least time is saved!


Puff Pastry Samosas
Yield: 30 samosas

For the filling:
3 medium-large russet potatoes
1/4 c frozen peas
vegetable oil
1/2 tsp ginger paste
2 thai green chilis
1/4 tsp cayenne pepper
1/4 tsp turmeric
1/8 tsp gaharam masala
1/2 tsp salt
cilantro (optional)

For the crust:
1 package puff pastry sheets (2 sheets)
all purpose flour


1. Preheat oven to 400degrees. Remove the puff pastry sheets from the freezer to start thawing.
2. Peel the potatoes and cube them very small (1/4-1/2" cubes)
3. Coat a skillet with oil and heat over medium-high
4. When the oil is hot, add the ginger and the green chilis and stir
5. After ~30 sec, add the potatoes and the remaining spices. Stir the potatoes to keep them from sticking to the bottom of the pan. Add a few tablespoons of water and stir again. Reduce heat to medium-low and cover.
6. Allow the potatoes to cook almost completely. When the potatoes are almost cooked through, add the peas. Keep cooking, adding water if necessary, until the potatoes are completely cooked. If desired, add some chopped cilantro to the filling. Remove from heat and allow to cool. Remove the green chilis from the filling and discard.
7. At this point, check on the puff pastry sheets. If they are defrosted enough to roll with a rolling pin, place 1/3 of one sheet on a lightly floured surface. Roll with a rolling pin lengthwise until the puff pastry is ~15 inches long. Cut into 5-3"x3" squares. In the center of each square, place 1 heaping teaspoonful of the potato filling. Fold the puff pastry square in half by connecting two distant corners (make a triangle) and seal shut with your fingers. Place each triangle on an ungreased cookie sheet. Repeat these steps with each strip of puff pastry sheet.
8. Once you've made 30 samosas, bake them at 400degrees for ~10 min, until beginning to "puff." Flip the cookie sheets to maximize even cooking. Bake for another 10min or so, until the samosas are just golden brown. Serve immediately with cilantro-coconut chutney, below. If you can't finish all the samosas (or if you don't let yourself finish them because of all the butter in the puff pastry...), you can freeze them. Allow to come to room temperature, and then reheat in the oven.


Coconut-cilantro Chutney
Yield: ~4-6 cups of chutney - a lot!
1 lb fresh frozen coconut (can be found in an Indian store, maybe in some grocery stores)
2 bunches cilantro, coarsely chopped
8 thai green chilies, finely chopped
salt to taste
mayonnaise to taste

Combine the coconut, cilantro, and chilies in a food processor and pulse to blend. Try to make the mixture fine, but don't blend for too long because the cilantro will develop a bitter flavor. Remove from food process into a large bowl. Add mayonnaise until the consistency and spiciness of the chutney is as desired. Add salt if necessary. You can freeze the coconut-cilantro-chili mixture if you aren't going to eat all of the chutney within 3-5 days.


Double Chocolate Mint Chip Cookies


Back when I was a little kid, my mom made delicious cookies using a brownie mix and mint chocolate chips. Then, the chocolate companies stopped selling mint chocolate chips (at least in regular grocery stores) and so my mom never made the cookies again. A couple of years ago, I was inspired to try to make them using chopped up Andes Mints instead of mint chocolate chips, and I have been making (and loving!) them that way ever since.

Ingredients:
1 5 oz. package Andes Mints, cut up into relatively chip-sized pieces
1 Brownie mix
1/2 cup all purpose flour
2 eggs
1/3 cup cooking oil

Directions:
Combine all ingredients, adding Mints last, stir until well mixed. Drop by teaspoonfuls onto ungreased cookie sheet. Bake at 350 degrees for 10-12 minutes or until cookies have just lost their gloss. Be careful not to overbake. Let cool for a couple minutes, remove from cookie sheet, and enjoy with a big glass of milk!

Friday, April 3, 2009

Aloo Gobi


Aloo = potatoes and gobi = cauliflower. This dish and its variations are some of the most basic staples in my parents' house. By variations, I mean that the spices and the method of cooking stay the same, but the vegetables vary. You can use basically any vegetable you like (for example, the snow peas were a random addition because I had some leftover from another dish). The generic term for this kind of dish is "subzi", so if you want to use other vegetables but still sound exotic just say that :). The standard veggies I use are cauliflower, zucchini, yellow squash, romanesco broccoli (this stuff is amazing--the taste of broccoli, consistency of cauliflower, but better than either), okra, green beans, bell peppers, and--my personal favorite--
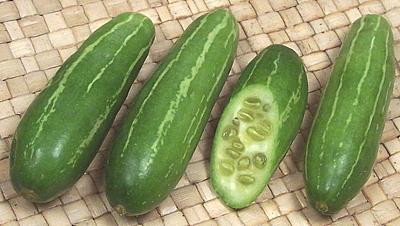
tindola (it's sort of like a 2" cucumber, with the consistency of a squash. sort of. hard to explain, and hard to find in the US). If you add tomatoes, eggplant, onions, spinach, you can make it a little soupier and eat with rice (or kichdi, a mixture of rice and lentils--carbs and protein in one shot, yay!). But I'll save a post about that for another day...

Aloo Gobi
yield: ~ 2 small servings

1 small head of cauliflower (I use a head that's ~2-3: in diameter--something I've only ever seen at the farmers' mkt in Mt View--but feel free to scale up the recipe or only use ~1/3 of a normal-sized head)
1 large russett potato, peeled
10 snow peas (~a handful)
~1/2 Tbsp vegetable oil
1/4 tsp mustard seeds
1/2 tsp garlic paste
1/2 tsp ginger paste
1 Thai green chili (optional--if using this, be careful, it will be spicy! consider omitting the cayenne pepper)
1/4 tsp cumin seeds
1/2 tsp whole black peppercorns (you can use ground pepper too, but it will make the whole dish look darker--personally I like it bright yellow)
1/4 tsp cayenne pepper
1/4 tsp turmeric
1/4 tsp cumin-corriendar powder
1/8 tsp gaharam masala
1 tsp salt

Cut the vegetables into cubes/small pieces. Any size is ok, smaller pieces cook faster, so the size will be a function of your personal preference and how much time you have. Keep the vegetables segretated. Since different vegetables require different cooking times, you'll want to put them into the pan separately.

Heat vegetable oil and mustard seeds in a skillet over medium-high heat. Use enough oil to coat the pan generously (but doesn't have to be TOO generous). Stay close by, because the mustard seeds will begin to pop as they heat up. Allow to pop for ~30 seconds, and then add the garlic and ginger pastes and the chili pepper if you're using it. Stir to make sure nothing sticks to the bottom of the pan. After ~30 seconds, add the remaining spices and the potatoes (or whichever vegetable takes the longest to cook), and stir to evenly coat the potatoes with the spices. If the potatoes seem to be sticking (as they will if you're using a non-nonstick pan), add a few tablespoons of water. Reduce the heat to medium-low, and cover the pan. Stir the potatoes occasionally and if they seem to be sticking feel free to add more water (but just add a little at a time--if you add too much then you'll have to boil it off). Once the potatoes are about half done, add the remaining vegetables and stir thoroughly to get some of the spices onto the newly added veggies. Again, cover and allow to cook until the vegetables are done to your liking. Taste and add more salt if necessary. Garnish with cilantro (if you must--personally I can't stand cilantro haha) and serve with bread of some sort. My favorite is roti or paratha, but naan would be fine too. Serve it hot, but it will keep for a day or so.


My variations/recommendations:
-If I'm making this with okra or broccoli, I generally omit the cayenne pepper, turmeric, and cumin-coriendar powder and I do use a green chili.
- I like to use the combination of zucchini, yellow squash and a little bit of spinach.
- Potatoes are a standard addition to any other vegetable